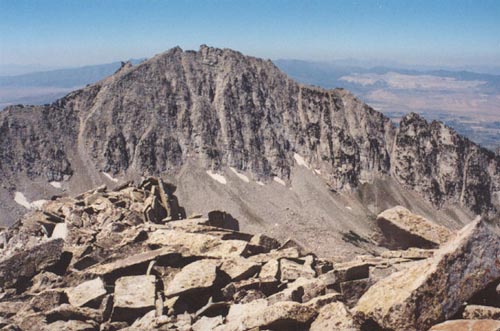
Thunder Mountain is a high, rugged pair of peaks near the mouth of Little Cottonwood Canyon easily viewed from the Salt Lake Valley. Thunder has two summits, north and south, with the south peak being four feet higher. It sees relatively few visitors being in the shadows of nearby Lone Peak, which is higher and considerably more popular. As difficult as the south peak is, North Thunder is even more difficult to ascend!
South Thunder is most commonly accessed from three routes, The Beatout Hike, Bells Canyon, and Lake Hardy. All are very long, full day hikes. I opted for the Lake Hardy route, which starts just above the town of Alpine at the water tanks. Passenger cars can drive to the water tanks without much trouble up the dirt road. From here one follows the dirt road past some areas popular with campers and begins to switchback up the steep mountainside (a few splits in the road typically meet up again). In years past you could stay on the dirt road (steep, but gentle compared with the new trail) all the way to the First Hamongog, but the greedy land owner has blocked the road in two spots to prevent trespassing (though hikers can easily get past the gates). Now the reccomended route is to take the "Lone Peak Trail" which is at a sharp switchback (marked with a sign, assuming it hasn't been vandalized). There is also a small turnout here that holds about two vehicles. It is best to park at the watertanks below where there is much more space, though high clearance vehicles can get up to this trailhead. The Lone Peak trail ascends very steeply up a trail full of loose rocks to the First Hamongog, and is much worse to climb than the old road.
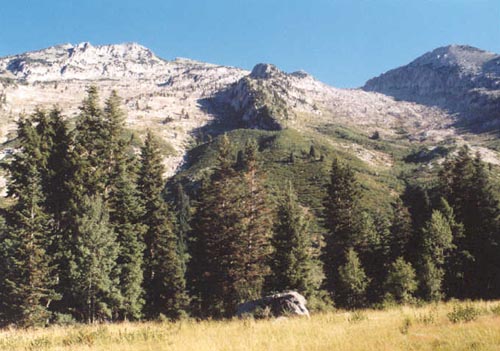
Just before reaching the First Hamongog you enter the Lone Peak Wilderness Area, and the headaches of private property are behind you. The First Hamongog (elev. 7,100') is a small but pretty meadow, with a good view of "Bighorn Peak" above (elev. 10,877, also known as Upper Bells Peak). As you enter the meadow, the trail splits with the left going to the Second Hamongog, the right goes to Lake Hardy via a steeper and less used route. I reccomend taking the trail to the Second Hamongog, as it's easier to follow and more scenic. The trail climbs gently thru the scrub oak before getting steeper as it climbs to the next meadow. Pine trees start becoming more common, and just before the Second Hamongog is a beautiful flat area full of tall pine trees providing much shade, and a great place to camp, or take a rest. From the Second Hamongog you have a better view of the slopes of Lone Peak above, and Bighorn Peak. Take a nice rest here, because the rest of the hike is difficult!
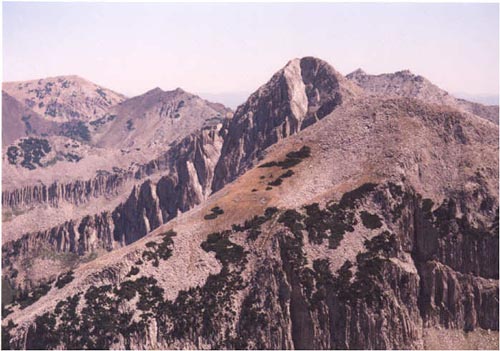
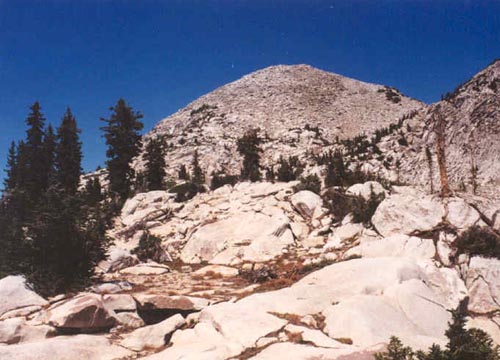
As you walk through the Second Hamongog (elev. 8,200'), a sign marks trails in various directions. Take the direction leading to Lake Hardy (right). The trail is clear, but gets rockier from here up to the south ridge of Bighorn Peak (elev. 9,400'). Just before the ridge you'll find a huge leaning rock, good for a picture, and a rest as it provides a nice area of shade on a hot day. The south ridge of Bighorn would make the best way up this peak. It is steep talus, but the easiest of the peaks primary ridges. Beyond the leaning rock, you climb slightly up and over the ridge and now you get your first view of the Lake Hardy area, walled in by impressive granite cliffs. The trail begins to fade across the granite slabs, but there are cairns, and finding your way there is easy. The route I took to South Thunder follows the trail all the way to the last ridge before Lake Hardy, and ascends this ridge back to the north. The ridge is pretty obvious, and is a gently angled granite slab slope. Just begin walking up the slabs, where in a few spots you may have to look around for the easiest way past tiny cliffs, but is for the most part easy walking. As you get higher, be sure to go to the eastern edge to see Lake Hardy in the bowl below. The round un-inspiring peak above Lake Hardy to the east is Chipman (elev. 10,954'), which could also be climbed from here. You don't actually see South Thunder until you are partway up this granite slab, where it comes into view as an equally un-inspiring pyramid of talus. To the west you have a great view of rugged Bighorn Peak and soon Lone Peak's ferocious east face. Wildflowers fill several of the small meadows up here and only enhance the already incredible scenery.
The final 350 feet of South Thunder get steep, and you'll have a choice of ascending pure talus on the peaks southwest ridge, or you can follow an area of intermittent tundra on the peaks southeastern side. I opted for the tundra slope, which was for me easier. This tundra went to very near the summit before turning to rock, for the final short boulder hop to the summit. Be careful of the immense exposure on Thunder's northeast side. From this summit you'll have one of the best views in the Wasatch, which is a good thing considering all the work you put in getting up here! The east face of Lone Peak dominates the view, and snow lingers below it in Bells Canyon through the summer. Looking back south you can see Box Elder and Timpanogos. Turning east you'll have a great view of the impressive cliffs at the top of Hogum Fork and the distant Pfeifferhorn, and the route taken on the "Beatout Hike". Looking north you can see the truly rugged ridge leading from South Thunder towards North Thunder (mountaineering terrain), with the Broads Fork Twins, Sunrise and Dromedary Peaks in the distance. Below is Bells Canyon Reservoir and the Salt Lake Valley, nearly 7,000 feet below! A small mailbox sits up here with a notepad where you can write about your South Thunder experience.
After spending a while on the summit I headed back down. Finding my way through the granite slabs was remarkably easy and soon enough I was back on the trail. The trip down was a long one, and I highly reccomend bringing A LOT of liquid and sun block for this hike! Along the hike I saw several deer in this seldom visited area. The only other people I saw all day were two other hikers going to Lake Hardy, who came to South Thunder's summit just about five minutes after I left, and two guys camping in the Second Hamongog who rode in on horses. I could hear (and see) hikers on Lone Peak's summit. I can't say I'd really ever do this climb again as it was very difficult, but the views were incredible, and it was certainly worth doing once.
Notable Distances (approximately) from the water tanks using the road: to First Hamongog, 1.8 miles (gain 1,600'). To Second Hamongog, 3.0 miles (gain 2,700'). To leaning rock, 4.0 miles (gain 3,900'). To Lake Hardy, 5.0 miles (gain 4,500'). To South Thunder summit, 6.0 miles (gain 5,650' - not counting some extra ups and downs). Using the "Lone Peak Trail" shortens the distance to the First Hamongog (and everything else) by about half a mile. Plan on an early start and a full day!